Mastering Finish Trim: Techniques and Tips for a Perfect Interior Finish
Understanding Finish Trim: Types and Functions
Finish trim is an essential element in interior design and carpentry, serving both aesthetic and functional purposes. It encompasses a variety of moldings and molding-like components that frame and accentuate architectural features, creating a polished and harmonious look within any space. Whether it’s crown molding that crowns a room, baseboards that transition between walls and floors, or window and door casings that define openings, finish trim elevates both the visual appeal and usability of interior environments. As experts continually refine finishing techniques, understanding the types and functions of finish trim becomes crucial for homeowners, designers, and craftsmen aiming for a superior interior finish. For those undertaking remodeling or new construction, selecting appropriate finish trim can significantly influence the overall style and value of a property.
Common Types of Finish Trim in Interior Design
Within interior design, finish trim manifests in various forms, each serving specific purposes while contributing to the overall decor style. The most commonly used types include:
- Baseboards: Installed along the bottom of walls, baseboards hide the joint between the wall surface and the floor, providing a finished look. They can vary from simple designs to elaborate profiles, with materials ranging from MDF to solid wood or PVC.
- Crown Molding: Found at the intersection of walls and ceilings, crown molding adds a decorative flourish that enhances the room’s perceived height and sophistication. It comes in many styles, from simple ogee shapes to intricate carvings.
- Door and Window Casings: These moldings frame openings, emphasizing architectural details and conceal gaps where walls meet frames. Casings can be flat or ornately detailed, aligning with traditional or modern aesthetics.
- Chair Rails and Wainscoting: Serving both decorative and protective functions, chair rails run horizontally to break walls into panels or sections, often paired with wainscoting for aesthetic appeal and wall protection.
- Picture Rails and Decorative Trim: Near the ceiling or as accent features, picture rails are used to hang artwork without damaging walls and add visual interest.
Each type of finish trim is available in various profiles, sizes, and materials, allowing customization to fit specific architectural styles and personal preferences.
Functional Roles of Finish Trim in Home Aesthetics
Beyond their decorative appeal, finish trims fulfill numerous functional roles that contribute to a home’s durability and usability:
- Protection from Damage: Baseboards and wainscoting shield walls from kicks, furniture scuffs, and moisture, especially in high-traffic or humid areas.
- Concealment of Gaps and Imperfections: Finish trim covers uneven edges, expansion gaps around doors and windows, and drywall seams, resulting in a seamless appearance.
- Enhanced Acoustics: Properly installed moldings can help dampen sound transmission between rooms, improving indoor acoustics.
- Improved Lighting and Visual Flow: Moldings like crown and picture rails can guide the eye upwards or along a room, emphasizing architectural proportions and creating visual flow.
- Facilitating Easy Maintenance: Finish trim simplifies cleaning processes by creating clear edges that are easier to dust and wipe.
Implementing well-designed finish trim adds perceived quality and craftsmanship that significantly elevate interior spaces, making them more comfortable and inviting.
Choosing the Right Finish Trim for Your Style
Selecting the appropriate finish trim style and profile hinges on understanding your overall interior design theme, personal preferences, and practical requirements. Here are key factors to consider:
- Design Style: Traditional interiors favor ornate, detailed moldings such as crown with elaborate carvings or thick baseboards. Modern or minimalist spaces prefer cleaner lines, slim profiles, or flat casings.
- Material Compatibility: Natural wood offers warmth and authenticity, suitable for classic or rustic decor. MDF and PVC are versatile, economical, and suitable for painting or modern aesthetics.
- Room Functionality: High-traffic areas like kitchens or hallways benefit from durable, moisture-resistant materials, while formal living rooms might feature more decorative options.
- Height and Proportion: The size of moldings should correlate with ceiling height and room dimensions. Taller ceilings can support larger or more elaborate trim designs.
To achieve a cohesive look, combine complementary trim profiles, considering the scale and detail level. For example, pairing a simple baseboard with an intricate crown mold creates a balanced and harmonious aesthetic.
Consulting with professional designers or skilled carpenters can help refine your choice, ensuring it aligns with your vision and enhances your home’s character.
Preparation and Planning for Effective Finish Trim Installation
Proper preparation and meticulous planning are the foundation of a successful finish trim project. From precise measurements to material selection, each step influences the final quality and appearance.
Measuring and Cutting Accurate Trim Pieces
Accurate measurements are crucial to ensuring tight fits and minimizing visible gaps. Use a high-quality tape measure and consider the room’s dimensions, accounting for wall irregularities and existing imperfections. Always double-check measurements before cutting. For cuts, a sharp miter saw provides clean, precise angles—especially important for corners. When cutting, measure twice and cut once, verifying angles and lengths to prevent costly mistakes.
Selecting Quality Materials for Long-Lasting Results
Quality materials are vital for durability and aesthetics. Solid hardwoods like oak, maple, or cherry offer premium looks and longevity but at higher costs. MDF and PVC trims are budget-friendly, resistant to moisture, and paint easily. Consider your environment: moisture-prone areas like kitchens and bathrooms benefit from water-resistant trims. For traditional interiors, natural wood maintains authenticity, while modern designs often favor sleek MDF or PVC options.
Tools and Safety Precautions for Finish Carpentry
Assembling a toolkit for finish trim involves essential tools: miter saws, nail guns or hammers, level, measuring tapes, adhesive, and caulking guns. Safety is paramount—use protective glasses, ear protection, and dust masks. Secure workpieces firmly and operate power tools according to manufacturer guidelines to avoid accidents. Proper safety measures guarantee efficiency and safety throughout the installation process.
Step-by-Step Guide to Installing Finish Trim
Following a systematic approach ensures your finish trim installation is seamless and professional-looking. Key steps include preparing surfaces, precise mitering, and secure fastening.
Preparing the Walls and Surfaces
Start by cleaning the walls to remove dust and debris, ensuring the trim adheres and sits flush against surfaces. Fill any holes or imperfections with spackle or putty, then sand smooth for a perfect surface. Check wall and ceiling levels with a level or laser tool to identify and correct any unevenness, which could distort the trim’s appearance. Marking reference points helps in aligning the trim accurately.
Techniques for Precise Mitering and Fitting
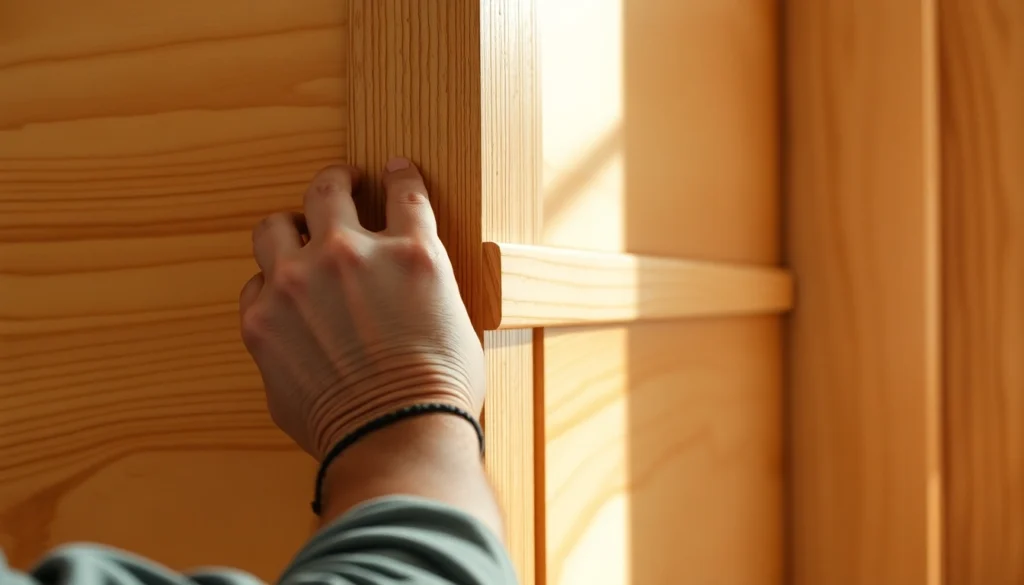
Corner joints require accurate miter cuts—typically at 45° angles for interior corners. Use a quality miter saw to achieve sharp, precise angles. For irregular or non-square corners, measure the exact angle on-site and adjust cuts accordingly. Test-fit each piece before securing, trimming as needed for a snug fit. Use clamps to hold pieces in place during assembly, ensuring tight joints with minimal gaps.
Securing and Finishing the Trim for a Seamless Look
Nail or glue the trim securely to the wall, spacing fasteners appropriately (usually every 16 to 24 inches). Countersink nails and fill holes with wood filler or caulk for a smooth surface. Check alignment frequently with a level. Use a nail set to hide fastener heads beneath the finish surface. When all pieces are installed, seal joints with adhesive caulk, pressing it into gaps to create a seamless appearance. Smooth out excess caulk with a damp finger or a caulk finishing tool for a clean finish.
Finishing Touches: Painting, Sanding, and Detailing
The final appearance of finish trim depends significantly on finishing techniques. Proper painting, sanding, and detailing elevate the craftsmanship and ensure longevity.
Optimal Painting and Staining Methods
Preparation before painting involves sanding the surface with fine-grit sandpaper for a smooth base. Apply a primer suited for your material, especially for bare wood or MDF. Use high-quality, low-VOC paints or stains to achieve an even, durable finish. For paint, choosing the right sheen—such as semi-gloss or satin—enhances both appearance and ease of cleaning. Stains can highlight the natural grain of wood, adding warmth and richness. Multiple coats and proper curing times yield the best results.
Sanding and Smoothing for a High-Quality Finish
After painting or staining, lightly sand with fine-grit paper to eliminate any brush strokes or imperfections. Use a tack cloth to remove dust before applying final coats. Ensure joint lines and edges are smooth, creating an integrated appearance. The quality of execution in sanding significantly impacts the overall finish, making the trim look professionally crafted.
Adding Caulk and Final Accents for a Polished Appearance
Carefully apply caulk at joints, corners, and between the trim and wall to conceal gaps and imperfections. Use a caulk with a paintable finish for seamless integration. Tool the caulk with a damp finger or a smoothing tool for a tidy line. Optional additional details include applying clear or tinted finish coats, adding decorative rosettes, or accent paints to emphasize style. The finishing touches transform standard trim into a work of art.
Maintenance and Troubleshooting Finish Trim Projects
Maintaining the beauty and functionality of finish trim ensures the durability of your investment. Addressing common issues promptly prevents further damage and preserves aesthetic appeal.
Common Issues and How to Address Them
- Cracking or Peeling Paint: Often caused by moisture or poor preparation. Re-sand affected areas, re-prime, and repaint with high-quality paint.
- Gaps and Gaps: Fill with flexible caulk and repaint or touch-up as needed.
- Water Damage: Replace or repair rotted wood or damaged sections, ensuring moisture barriers are in place.
- Loose Trim: Re-secure with appropriate fasteners and re-caulk or paint as needed.
Regular inspection and prompt repairs extend the life of your finish trim considerably.
Cleaning and Preserving Your Finish Trim
Cleaning involves gentle dusting with a microfiber cloth or vacuum with brush attachment. For deeper cleaning, use a mild soap and water solution, avoiding harsh chemicals that can damage paint or finishes. To preserve the beautiful appearance, avoid excessive moisture and direct sunlight, which can cause fading or warping.
When to Refinish or Replace Trim Pieces
Signs indicating the need for refinishing include peeling paint, cracks, or warping. If the damage is extensive, replacing certain pieces may be more cost-effective and aesthetically pleasing. Using durable materials and proper installation techniques minimizes the frequency of major repairs, ensuring your finish trim remains a highlight of your interior for years to come.